| You may wish to check out the "before" pictures at the link below. I've also added new photos & info on ceramic shapes: Tumbling Instructions Recipe |
"Go To" :
Check out my ebay store,
Flickr, African Adventures &
even buy crystal/mineral
postage & postcards on
Zazzle!
Check out my ebay store,
Flickr, African Adventures &
even buy crystal/mineral
postage & postcards on
Zazzle!
| Tumbling Page 2 - Finished results: Here's how the batch turned out! Updated May 13, 2018 11:00 AM Eastern Time |
| Helpful navigation tips for our site: REFRESH: We update frequently so be sure to refresh your browser to see any changes. TIME STAMP: On the upper left there is usually a date and time showing when the page was created or updated. CHECK BOTTOM OF PAGE: If you see a recent date, that indicates something new is on the page and often it will be added to the BOTTOM OF THE PAGE. (that's because it is much easier to simply add it to the bottom as compared to moving dozens of photos and text boxes to make room at the top of a page). ENLARGE PHOTOS: Almost all photos will expand when you click on them. Those that have a plus sign when you hover your cursor over the photo can be enlarged even further. YELLOW LINKS: Links are almost always in YELLOW unless I just happen to miss doing that. Otherwise they will be the standard blue color. SITE MAP: It's your friend! I've been adding pages to this site for years and it has become a monster. But, it is a manageable monster. It's easy to get lost and confused and the site map will likely help you find your way back home. Look for site map links on the upper right of most pages. I've also added it to most navigation bars as well as the 'go to' drop-down menu. "GO TO": Almost every page has a 'go to' drop down menu with a link to home, the site map, and most of my other presences on the web such as ebay, flickr, twitter, zazzle, etc. |


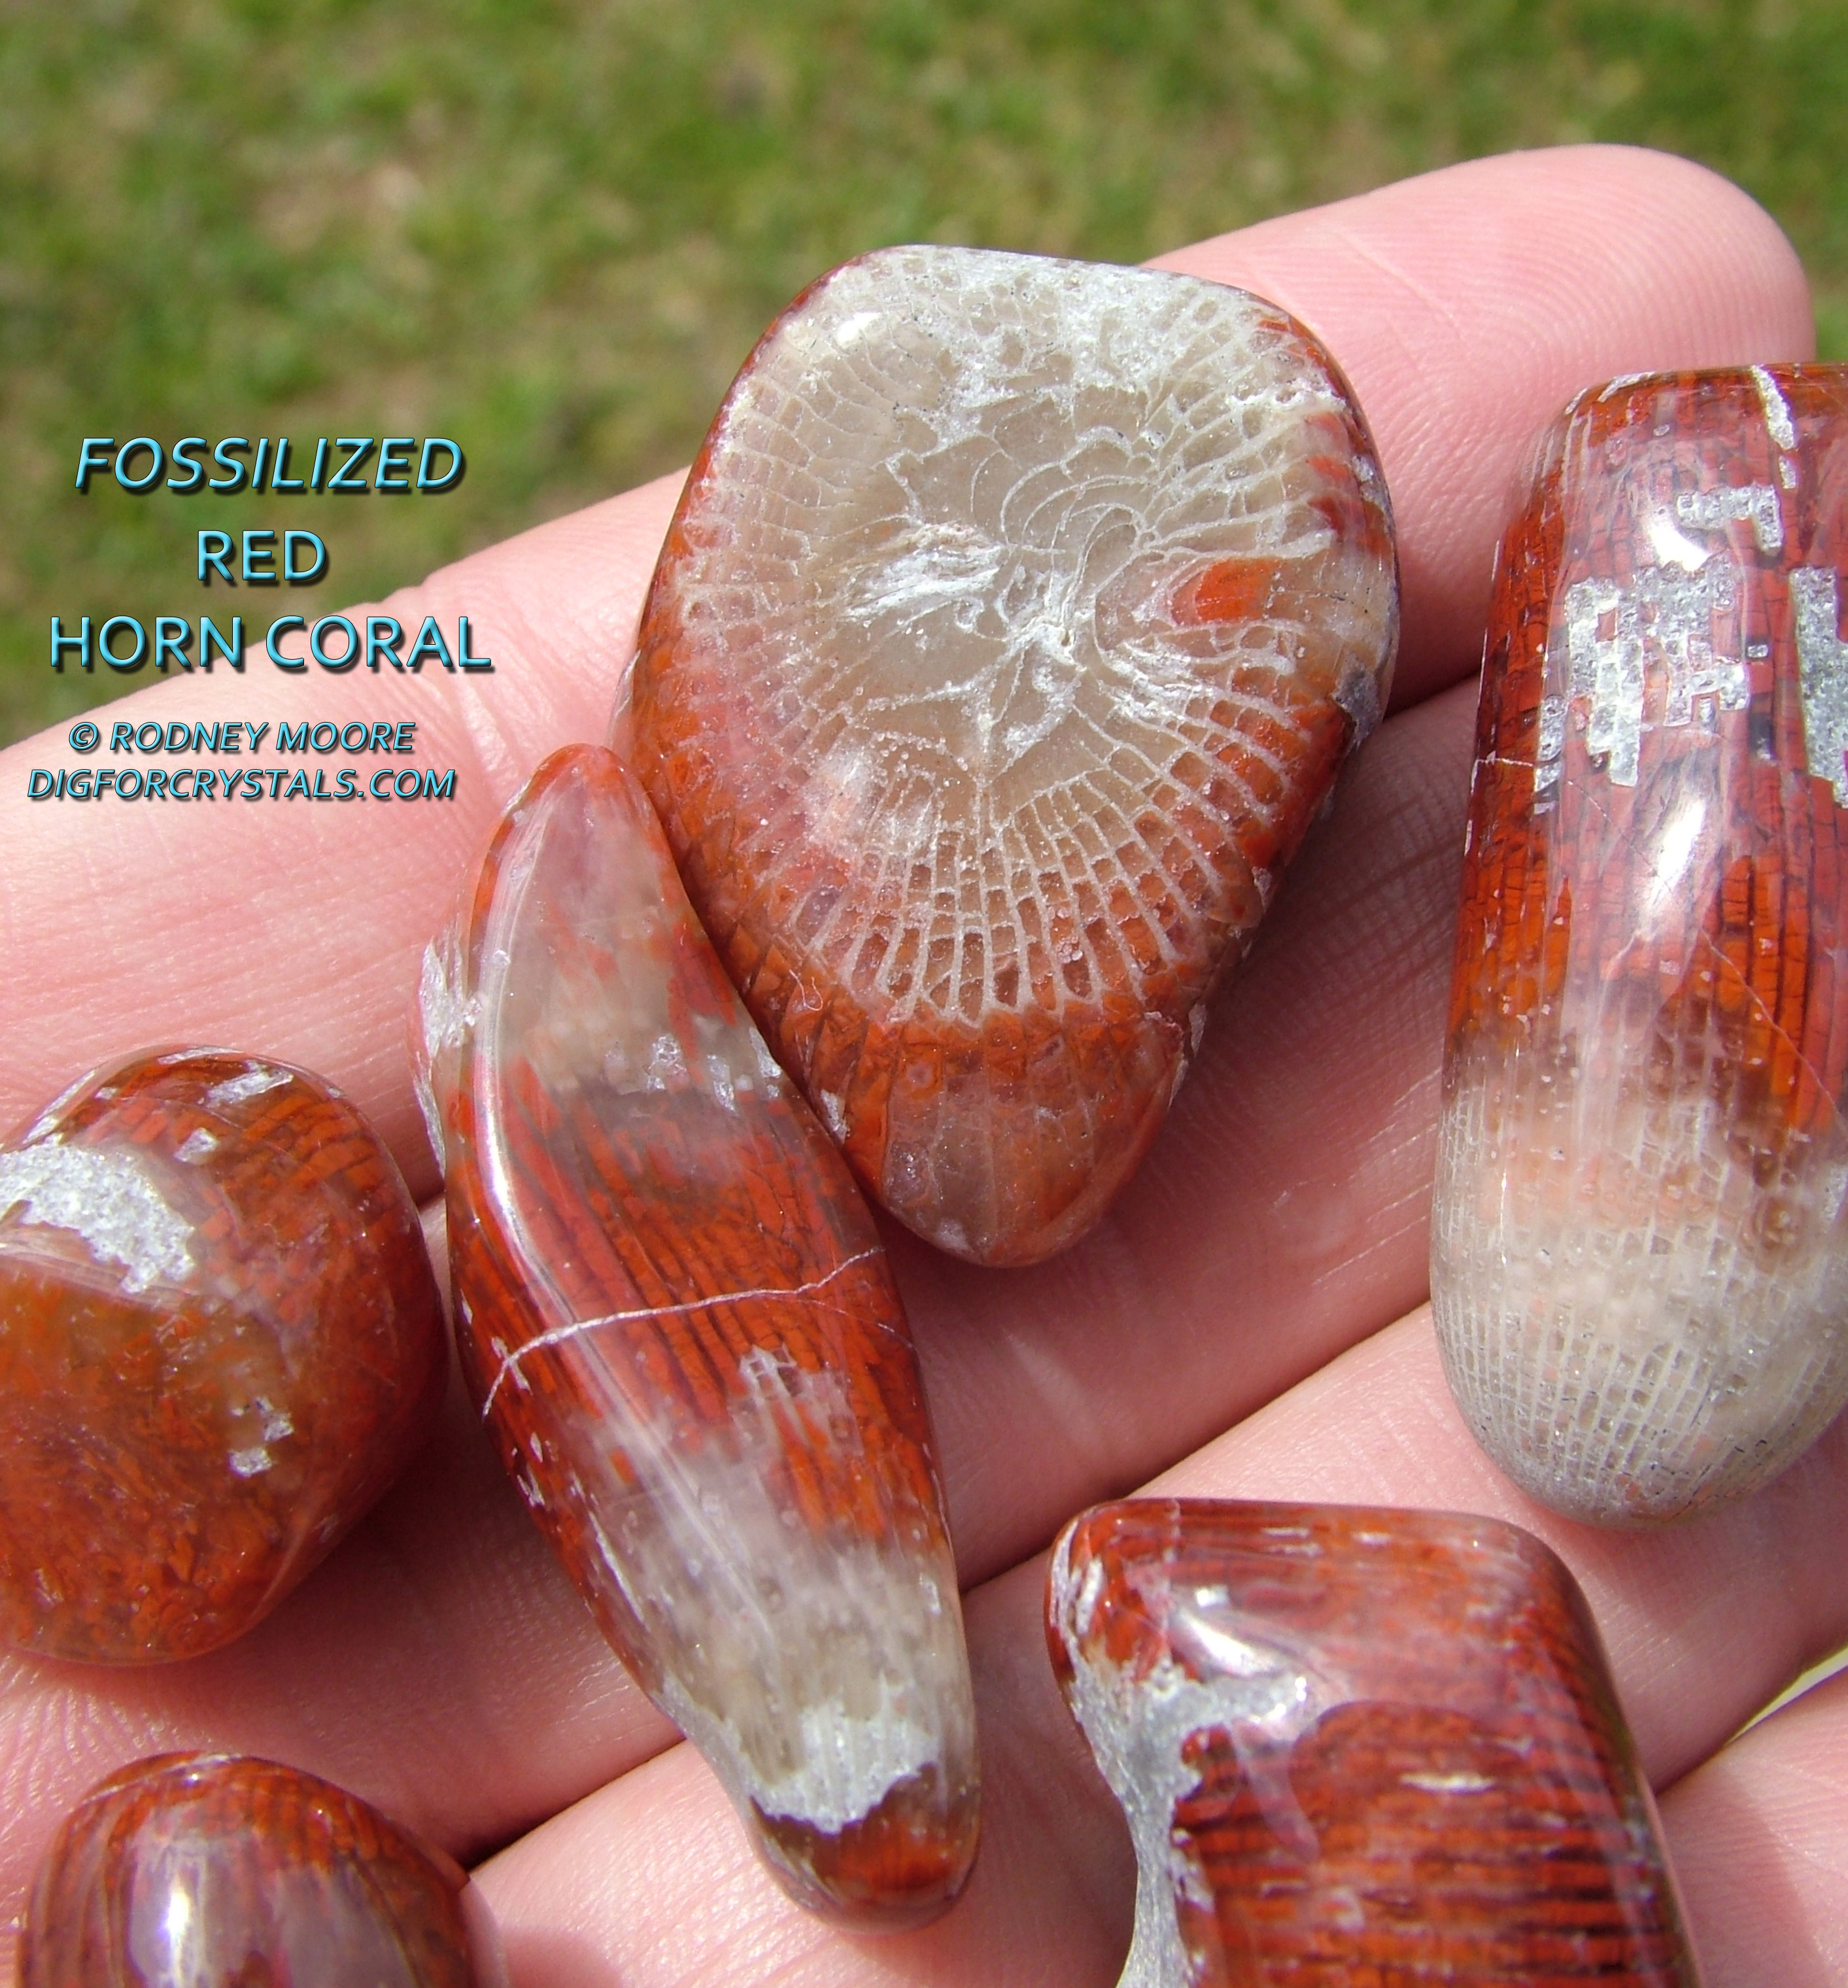
| The fossil red horn coral (shown at left and below) turned out fantastic. Note how much smaller they turned out compared to the original size on the previous page! |

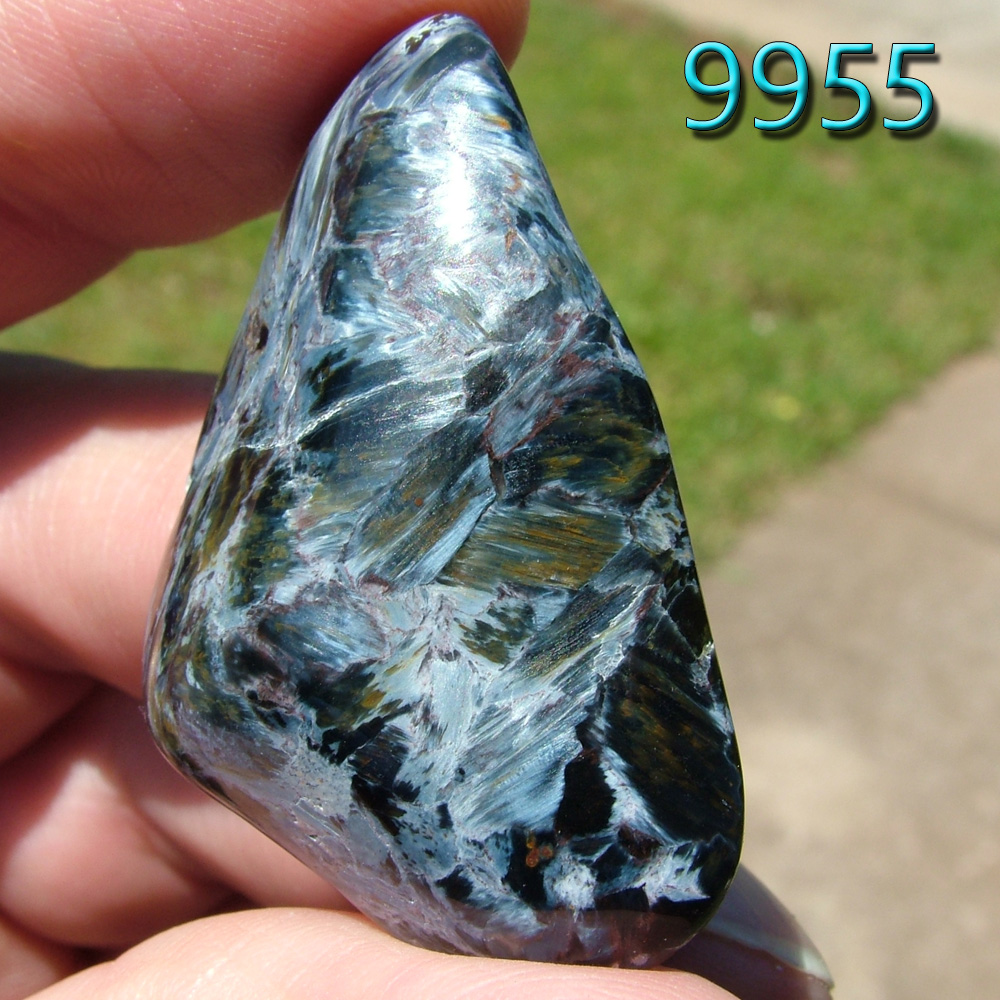
| The pietersite shown at left also turned out fantastic. I'll have lots of close-up photos of the individual pieces lower down on this page. First I'll show the group shots of everything. |


| The rutilated quartz and the ametrine shown at left turned out okay. Some were great, some fair, and some were a little beat-up. This indicates that I needed more small buffer material in the batch. See further down for lots of individual photos of this material. |


| Shown at left is the small ametrine chips and amethyst. I ended up with a full plate of the small material. Shown below is some odds and ends as well as stones that I used as a filler and buffer. When you go from one stage to the next you need to add material to keep the barrel full to the correct level. I used some ceramic shapes (not shown) and also some stones that didn't have a good polish - and even a few that had a good polish but I just needed them to bring the level up so now those have an excellent polish! |
| Below is photos of one of the best pieces of pietersite. It is excellent material that looks fantastic when polished! |


| At left and below is a small and big woodward ranch agate nodule or "biscuit" that I collected myself and then tumble polished. Trey Woodward recommended at least tumbling in coarse grit to remove the skin so that you can see what kinds of patterns are inside. The thick rough skin always hides the interiors which can vary wildly in appearance! |


| At left is a black plume agate slab / slice that polished well. I'm not sure if I dug this at Woodward or in Marfa or if I got it in an estate that I bought. |


| Below is Ametrine that I tumble polished. The smaller pieces turned out much better than the larger pieces. The bruises indicate that I didn't have enough small buffer material. Quartz can be really tough to polish as it bruises readily and much more so than other materials. I didn't waste any time getting this on the shelves at my rock shop in McDonough, Georgia. |


| Click on photos to enlarge. Some expand twice and are high resolution that will fill even the widest screens. |


| Below are some hi-res photos of polished fossillized red horn coral. Most greatly expand. |


| Below is some "Gary Green" also known as "Larsonite". Beside that is some tiger eye slabs and Arizona Petrified Wood. |


| Below is some of the rutilated quartz. Some are perfect but some are bruised on the edges. Quartz is really susceptible to doing that. When you see edge bruising it generally means that there was not enough small buffer material used to cushion the stones impact. With the next batch I will add a lot of small and large sized ceramic media. |


| Below is more examples of polished pietersite. I have these for sale in my rock shop in McDonough as well as listed on ebay. |


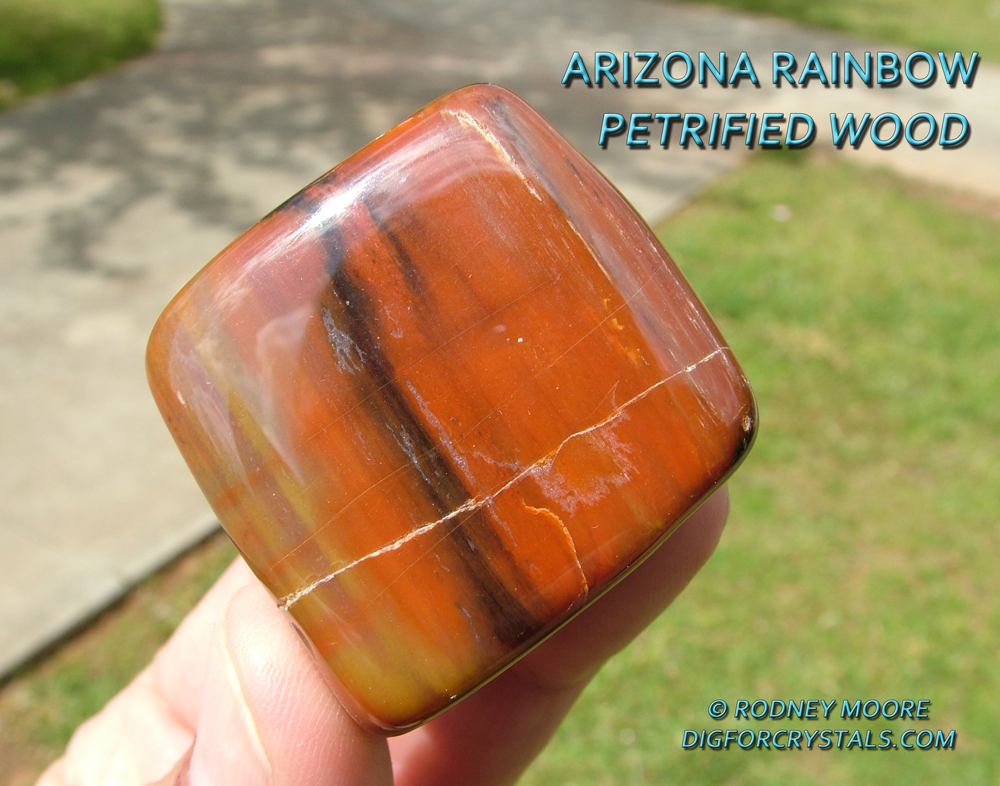
| Arizona Rainbow Petrified Wood that I dug in Arizona. Polished to perfection! |


| If you're in Georgia you can purchase these at my rock shop in McDonough, Georgia (store web page below) or you can check out my items on ebay. Just enter the item name in the search box that searches my store content. Please note that items with a number in the photo are likely listed on ebay, but if there is no number in the photo then that exact item is probably in my physical brick and mortar shop with only a similar item available on ebay. CLICK HERE FOR MY EBAY STORE |

| At left is an agate from Australia. I was lucky to find some rough material at an obscure show in Alpine, Texas that I sometimes vend at. I was also able to get some nice Amethyst crystals from Australia as well. These were both from a dealer that vacations in Australia. I got the amethyst before people in the public knew about the new finds. |
| I've added new pictures on the previous page that show the ceramic shapes that are used to improve the grinding and polishing, and most importantly, to cushion to stones so that they don't bruise or chip. Quartz is very bad about bruising on any thin edges. In hindsight I should have added a lot more of the ceramic shapes. Yes, they can be a hassle to deal with as you have to catch them when rinsing off the stones between grit phases. Yes, they are expensive and they do wear down which adds an expense to polishing the rocks. The results are worth it though! If you sell any of the stones the higher quality will easily pay for itself. Lower down is a link to my rock shop and ebay store if you are interested in buying some tumble polished stones. I've started a new batch of the same types of stones and I an changing the recipe up some in order to see how this effects the finished results. I'll post a link to new pages with the altered recipe and the results lower down at the bottom of this page. |
| More Pietersite and other tumbled stone photos are shown below: |


| | |
| There's more! Use the navigation bar at top of page to check out the new "Tumbling Page 3" where I compare my Lortone QT12 with my Thumler's Ar12. |